


The Best (Artist-Approved) Practices for Managing Your Art Inventory
👁 128 Views
Wait, Do You Really Need to Organize This?
Managing your art inventory probably wasn’t the part you dreamed about when you started making art. No one picks up a paintbrush thinking, “Wow, I can’t wait to organize my spreadsheets.” But here’s the thing: keeping track of your work, what’s sold, what’s sitting in a gallery, what’s hiding under your bed, is a form of self-respect. It’s you taking your practice seriously.
You don’t need a fancy studio or an assistant with a clipboard to start managing your art inventory. You just need a bit of intention and a system that works for you. Keeping track of your pieces isn’t just for “serious” artists with gallery shows, it’s for anyone who’s ever asked, “Wait, where did I store that piece again?” Trust me, even sticky-note systems eventually fail.
An inventory helps you stay organized, sure, but more importantly, it gives you clarity. You’ll be able to see what you’ve made, what’s sold, what’s still available, and where each piece currently lives. That’s a massive relief when a curator asks for a specific size or a collector wants to see your latest work. You won’t need to dig through your camera roll and pray you remember the year.
Plus, it helps you feel like a pro. You’re treating your work like it matters, because it does. Creating is only part of your practice. Managing it with care, respect, and visibility makes you not just an artist, but an artist who means business.
Digital or Analog? Find Your System
There’s no one-size-fits-all when it comes to organizing your art inventory. Some artists love a good spreadsheet, rows of dates, titles, and mediums neatly lined up. Others cringe at Excel and prefer an app that lets them drag and drop images. The key is finding a method that aligns with how your brain works, not how someone else said you “should” do it.
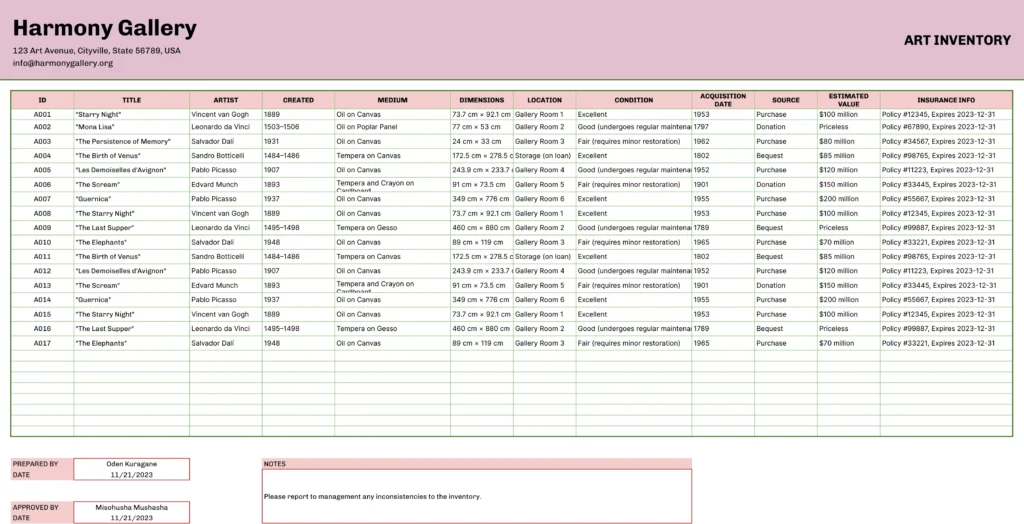
You could use a simple Google Sheet with columns for title, dimensions, year, medium, and location. Or go full-on digital with inventory apps like Artwork Archive, Art Galleria, or even Airtable for a more visual feel. Prefer physical tools? A binder with printed thumbnails and handwritten notes can totally work too. Your method just needs to be sustainable.
The best system is the one you’ll actually use. Don’t let the setup stage scare you off, just start with your most recent five pieces. Once you get going, you’ll start to feel the ease that comes with knowing your collection isn’t floating in limbo anymore.
Label Everything. Yes, Even the Sketches
If it exists, label it. Whether it’s a completed canvas, a half-finished watercolor, or that napkin drawing you swear is going somewhere, give it a name, a date, and some basic details. It doesn’t have to be elaborate, but it does have to be consistent.
Labeling your work helps you keep track of your artistic evolution. You’ll start noticing themes or color palettes that pop up over time. Maybe you have three pieces that all use burnt sienna and speak to grief, now you’ve got a mini-series on your hands. But you wouldn’t know that if everything stayed untitled or in an “unsorted” folder.
Even sketches matter. They’re the breadcrumbs of your process. If a gallery ever wants to see your process or you decide to write about how a piece came to be, those early bits are gold. Label them now, thank yourself later.
Pics or It Didn’t Happen (Seriously, Take the Photo)
Sure, you remember what “Untitled No. 6” looks like… until you realize you’ve got three untitleds and you can’t remember which one had the teal moon. Adding images to your inventory isn’t just helpful, it’s necessary. A visual reference makes locating, sharing, and showcasing your work ten times easier.
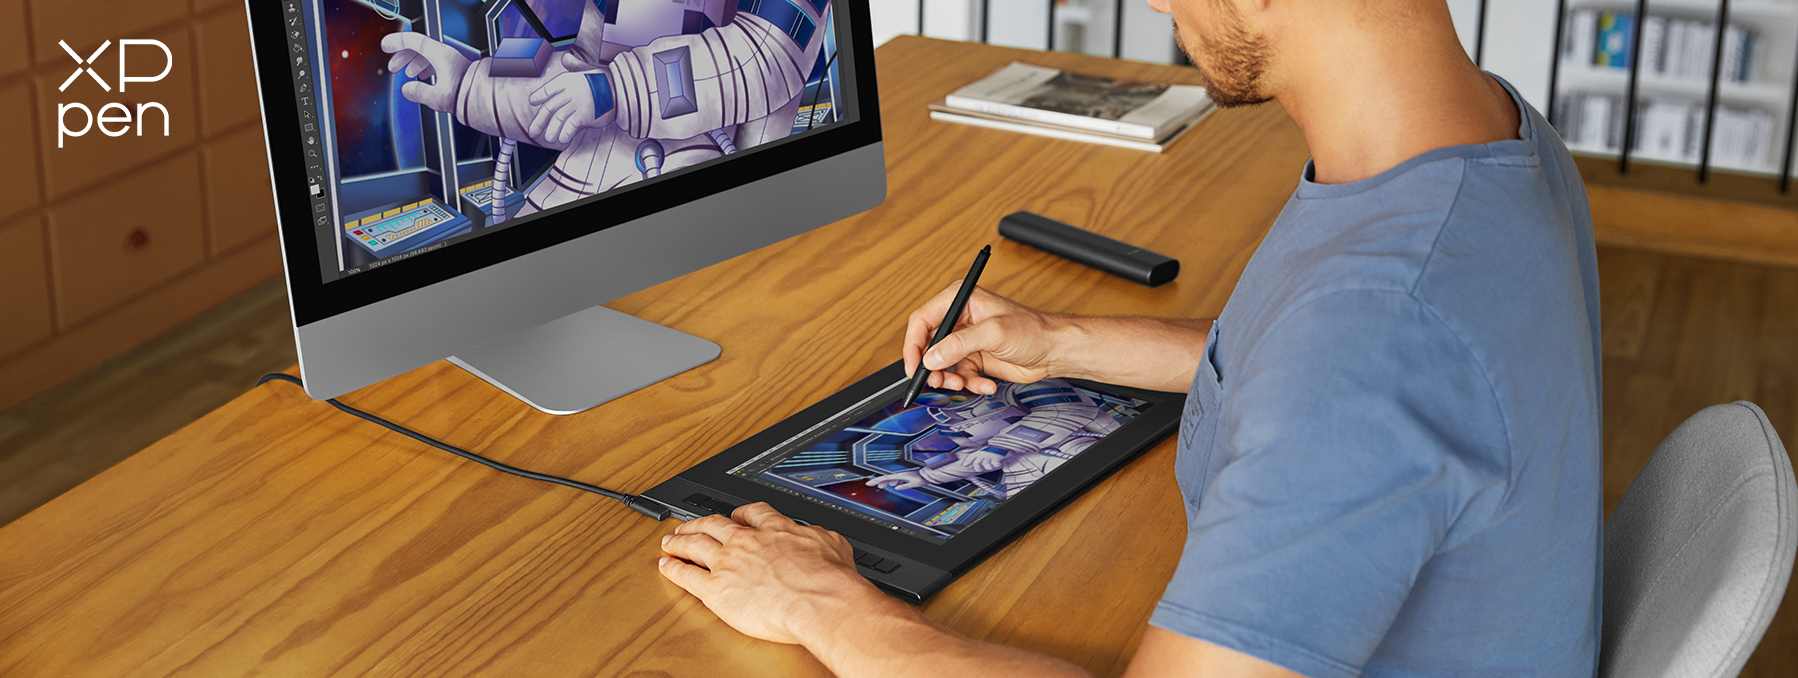
Take clear, well-lit photos of every piece, even the in-progress ones. Use consistent lighting and a neutral background if possible. Label the photo files to match your inventory title so things don’t get messy. And if your work is 3D, include multiple angles.
Bonus tip: Include detail shots! Collectors and curators love seeing texture, brushwork, or stitching up close. Those little glimpses can make all the difference when someone’s trying to connect with your work online or through a PDF catalog.
Track the Story of Each Piece
Every artwork has a backstory, where you made it, what inspired it, what shows it’s been in. Include that! Keep a simple notes column in your inventory with those details. It adds context for you, and magic for everyone else.
Maybe you painted something during a hard winter or stitched it while listening to a podcast about folklore. Maybe it was part of your first group show, or you made it while experimenting with new materials. These little footnotes humanize your work and make it easier to talk about later.
It also comes in handy for interviews, grant applications, or marketing. Imagine someone asking about your work and instead of freezing, you already have a note saying, “This was made during a time of transition,when I was moving cities.” Boom, instant depth.
Location, Location, Location
Where is your artwork right now? Like, literally. Is it hanging in your studio? At a group exhibition? In a collector’s home? Under your bed in a flat file? Add a location column in your inventory and keep it updated.
It might feel tedious, but this prevents future headaches. When someone inquires about a piece, you won’t accidentally promise a work that’s already on loan or sold. If you’ve got a lot of pieces moving around, consider adding a date column to track how long something has been in a particular place.
You can even color-code your list if that helps. Green for available, yellow for on loan, red for sold. Or use emojis if you’re feeling whimsical (🖼️ = framed and ready, 📦 = in storage, 🔴 = sold). Whatever keeps you engaged and clear.
Document Sales and Collectors
If you’ve sold a piece, celebrate, and document it! Add details like the buyer’s name, contact info (with permission), price, and date of sale. This isn’t just about bookkeeping, it’s about building a network of supporters and collectors.
These records also help you track your pricing history. You’ll know how your value has evolved and what price ranges work best for your audience. When pricing new work, you won’t have to start from scratch or rely on guesswork.
And remember: people who buy from you once are more likely to buy again. Keeping notes on collectors can help you build relationships over time. Maybe next year you send them a private preview of your next collection. That kind of thoughtful follow-up builds trust, and sales.
Don’t Forget the Back of the Canvas
This might sound random, but labeling the physical back of your artwork matters. Write the title, year, your signature, and maybe a short description or material note. If the piece gets separated from your inventory somehow, the back label will help you (or someone else) reconnect the dots.
Some artists even include a mini sticker with a QR code linking to the piece’s page on their website or online archive. It’s a smart move, especially if your work travels often. Imagine someone discovering your piece at an art fair or resale site and scanning the code to learn more, instant connection.
This tiny detail makes you look incredibly prepared and professional. It’s also an extra way to embed your voice and story into the physical work, even when you’re not there to speak for it.
Consider Using Art Inventory Software
If you’ve reached the point where your spreadsheet can’t keep up, it might be time for a digital upgrade. Art inventory software can streamline your system with search features, portfolio views, collector management, and even sales tracking.
Platforms like Artwork Archive, ArtMoi, and ArtLogic cater specifically to artists. They help you tag work by series, location, price, and more. You can generate reports for galleries or exhibitions, export beautiful catalogs, and track your whole collection with ease.
Yes, there’s usually a cost involved. But if it saves you hours of admin stress and helps you feel more in control, it’s often worth it. Try out free trials first and pick the one that matches your needs and budget.
Want a tool that looks good and keeps you organized? The Artist Inventory Tool from Arts to Hearts is honestly a game-changer. Your future self (and your studio) will thank you. It’s made for creatives like you, and it shows.
Back It Up Like a Boss
Losing your art inventory is a nightmare you don’t want to live through. Make it a habit to back up your files, whether it’s your Google Sheet, your photo folder, or your inventory app. Tech issues happen. Hard drives crash. Clouds get cloudy.
Set a reminder once a month to export a copy of your data and store it in two places: one on a cloud (Google Drive, Dropbox, iCloud) and one physical (like an external hard drive). It might sound over-the-top now, but you’ll be so glad you did it the day something goes wrong.
And don’t just save the raw data. Back up formatted portfolios, price lists, and notes too. If your inventory also includes promotional materials or process journals, back those up as well. Think of it as protecting your artistic legacy.
Inventory Isn’t Just for Finished Pieces
Here’s the thing: not all your work lives in a “completed” state, and that’s okay. Your half-done pieces, experimental studies, and even ideas in progress deserve a space in your inventory too. Why? Because these are part of your creative ecosystem. They hold potential, inform future projects, and might even be revisited down the road.
Give unfinished work its own category. Label it “in progress,” “concept,” or “studio experiments.” Include notes on what you were exploring or struggling with. Maybe one day you revisit it and see something new. Or maybe it’s a dead-end, but even that tells you something about your artistic journey.
Also, including your “works-in-progress” (WIPs) makes your practice feel more alive and less perfection-driven. It gives you a bird’s-eye view of what’s cooking. And let’s be real, artists rarely work in neat, linear timelines. Your inventory should reflect that beautiful messiness.
Make Inventory Part of Your Creative Ritual
Managing your art inventory doesn’t have to feel like admin. Try turning it into a monthly or bi-monthly ritual that feels creative in itself. Brew some tea, light a candle, then sit down with your inventory and check in with your work.
Use this time to upload new pieces, reflect on what’s sold, and notice what themes are emerging. Ask yourself: What’s been lighting me up lately? What am I tired of? These little rituals help you connect with your practice in a deeper, more intentional way.
You might even start noticing that your creative output changes with each inventory session. Maybe you’re more experimental after reviewing your older work. Or more focused after realizing you’ve made five versions of the same idea. Inventory isn’t just for tracking, it’s for tuning in.
Share a Peek With Your Audience
Once your inventory is in place, consider sharing snippets of it with your community. You don’t need to post the whole spreadsheet (please don’t), but you can turn inventory details into Instagram posts, newsletter features, or behind-the-scenes stories.
Tell the story of a piece’s journey, where it started, how it changed, where it ended up. Show side-by-side images of a work-in-progress and the final result. Talk about the materials you’re obsessed with this month, or how you’re cataloguing your newest series. It invites your audience into the process.
Plus, this creates a deeper connection with potential collectors. When they see that you’re organized, thoughtful, and aware of your work’s evolution, it builds trust. And trust is a huge part of why people buy art. You’re not just selling a product, you’re sharing a story.
Spoiler: You Don’t Need to Be ‘Famous’ to Get Organized
One of the most common mistakes artists make is waiting until they’ve “made it” to get organized. But your inventory matters now, not just when you’re applying to big exhibitions or talking to a gallery. In fact, starting early gives you an enormous advantage.
When the right opportunity shows up (a group show, a residency, a feature), you’ll already have everything in place. You won’t scramble to find high-res photos or forget what year you made that key piece. You’ll respond with confidence and clarity, and that energy is magnetic.
Remember: getting your inventory together isn’t about pretending to be professional. It’s about being prepared. You’re building something real here. And taking care of your work now is a way of honoring the future you’re working toward.
Build Categories That Reflect You
As your body of work grows, start thinking about how you want to organize it beyond just date or medium. Maybe you have recurring themes, like identity, memory, nature, protest. Maybe you work in series, or by seasons, or by emotional tone.
Create custom categories in your inventory that make sense to you. Label pieces by collection name, thematic thread, or even mood. For example, you might have a “Quiet Grief” collection, a “Light Play” series, or a group of “Kitchen Table Studies.” These creative labels help you talk about your work with more nuance later.
This kind of intentional organizing also helps when you’re pitching work for group shows or residencies. If the theme is “ritual” or “reclamation,” you’ll already know which pieces match, because you’ve thought about your own throughlines. That saves time, builds clarity, and deepens how you relate to your own practice.
Review and Refresh Your Inventory Regularly
Treat your inventory like a living document, not a static one. Set a reminder every few months to review it. Add new works, remove pieces you’ve repurposed, and update locations, prices, or notes that have changed. This is especially important if you’re sharing the same work across multiple platforms or galleries.
Sometimes, reviewing your inventory will show you how far you’ve come. You’ll look back and realize how much your work, and your voice, has evolved. That’s incredibly motivating. Other times, it helps you spot what needs refining: maybe it’s time to raise your prices, or retire a piece that no longer reflects your current work.
Keeping your inventory fresh also ensures that when an opportunity knocks, you’re ready. Whether it’s a grant, a feature, or a spontaneous collaboration, having your work updated and accessible saves you stress and gives you an edge.
Inventory Is an Act of Self-Respect
At the end of the day, art inventory isn’t just admin, it’s devotion. It’s a way of saying, “This work matters. I made it, and I’m going to care for it.” And that kind of care radiates outward. Collectors feel it. Curators feel it. You feel it most of all.
Managing your inventory won’t make your work better, but it will make you feel more grounded in your practice. It gives your art a home, a history, and a structure that supports your growth. It helps you show up with clarity, confidence, and calm, especially when opportunities arise.
So whether you’re starting with ten pieces or a hundred, just start. Give your work the structure it deserves. Not because someone told you to, but because your practice, and your voice, are worth protecting.